
Building an Astro site is the enjoyable part. Then you run npm run build, get a dist folder, and wonder where it actually goes. Every host says it takes one click, and for a static Astro site that’s nearly true. The trouble is in the small things nobody mentions until you’re staring at a blank 404 page or a login screen you never set up.
So instead of repeating the docs, I tested it. On 17 November 2026 I took one of our Astro templates exactly as a buyer downloads it (Bistrofeast, a restaurant site with 15 pages), built it on a normal Windows PC, and deployed it to Cloudflare, Netlify and Vercel with their own command-line tools. I timed each step, wrote down everything that went wrong, and deleted the test sites afterwards. GitHub Pages and ordinary web hosting are covered too, from Astro’s official guides, and I’ll say clearly where that’s the case.
The short answer
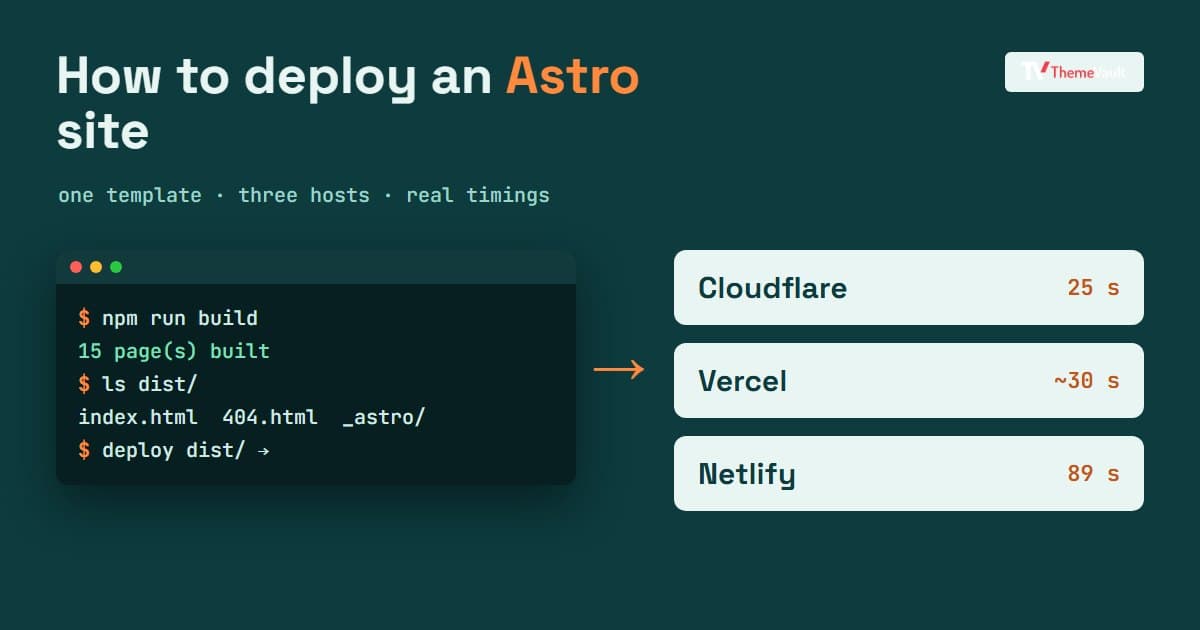
For a static Astro site (no server rendering, which is what most business and portfolio sites are), all three big hosts work well on their free plans, and the deploy itself took under a minute and a half on each. What differs is the detail:
| Host | Deploy time in my test | Your 404 page | The thing that caught me out |
|---|---|---|---|
| Cloudflare (Workers) | 25–29 seconds | Only after one setting | New sites now go to Workers, not Pages, and a missing page showed a blank 404 |
| Netlify | 89 seconds | Automatic | The new site asked every visitor to log in to Netlify |
| Vercel | About 30 seconds | Automatic | Ignores _headers files, and each deployment’s private link asks for a Vercel login |
And one mistake that happens on every host, which I made on purpose in the first test: if you don’t set your address in astro.config.mjs before you build, every page tells Google it lives at example.com.
Before you deploy: three checks
1. Set site to your real address. Open astro.config.mjs and change the site line to the address the site will live at, such as https://www.yourrestaurant.com. Astro builds the canonical links, the sitemap and the RSS feed from it. In my first Cloudflare test I left our template’s placeholder in place, and every page went live with <link rel="canonical" href="https://example.com/">. The site looked perfect, and I only noticed when I viewed the page source. If you don’t know the final address yet, deploy once, copy the address the host gives you, set it, and build again.
2. Build it on your own computer first. If it doesn’t build on your machine, it won’t build on a host, and the host’s error log is a worse place to find out. Our template’s packages took 4 minutes 15 seconds to install on my PC, and the build took 41 seconds for 15 pages:
npm install
npm run build
npm run preview   # opens the built site locally, so you can click through it
One small trap: npm ci, which many guides use, only works when the project includes a package-lock.json file. Our template zip doesn’t ship one, so npm ci stopped with an error and npm install was the right command. The same goes for hosts: if your project has no lock file, let the host use npm install.
3. Check your Node version. The Astro version in this template (7.3) needs Node 22.12 or newer. Run node -v locally, and if a host builds your site for you, make sure it uses a recent Node too.
After the build, the dist folder holds the whole website: plain HTML, CSS, JavaScript and images, 22 MB in our case. Everything below is just different ways of putting that folder online.
Cloudflare: Workers is the new default
If you read an older guide, it will tell you to create a Cloudflare Pages project. That’s no longer the advice. Astro’s own Cloudflare guide now says “Cloudflare recommends using Cloudflare Workers for new projects”, and Cloudflare’s command-line tool agrees: when I ran the old wrangler pages project create command with Wrangler 4.163, it switched me over to the Workers route instead of creating a Pages project. For a static site you don’t need the Cloudflare adapter at all; that’s only for pages rendered on demand.
The setup is one small file in the project folder, wrangler.jsonc:
{
  "name": "my-astro-site",
  "compatibility_date": "2026-11-01",
  "assets": {
    "directory": "./dist",
    "not_found_handling": "404-page"
  }
}
Then build and deploy:
npm install wrangler@latest --save-dev
npx astro build
npx wrangler deploy
On your own computer, npx wrangler login connects Wrangler to your Cloudflare account first (I used an API token instead, which does the same job). My deploy uploaded 441 files and was live in 25 to 29 seconds at an address ending in workers.dev. The new address took a couple of minutes to start answering, so if your first visit fails, give it a few minutes.
That not_found_handling line matters. In my first deploy I left it out, and a mistyped address returned a correct 404 status with a completely blank page. With the line added, Cloudflare served the template’s own 404 page:
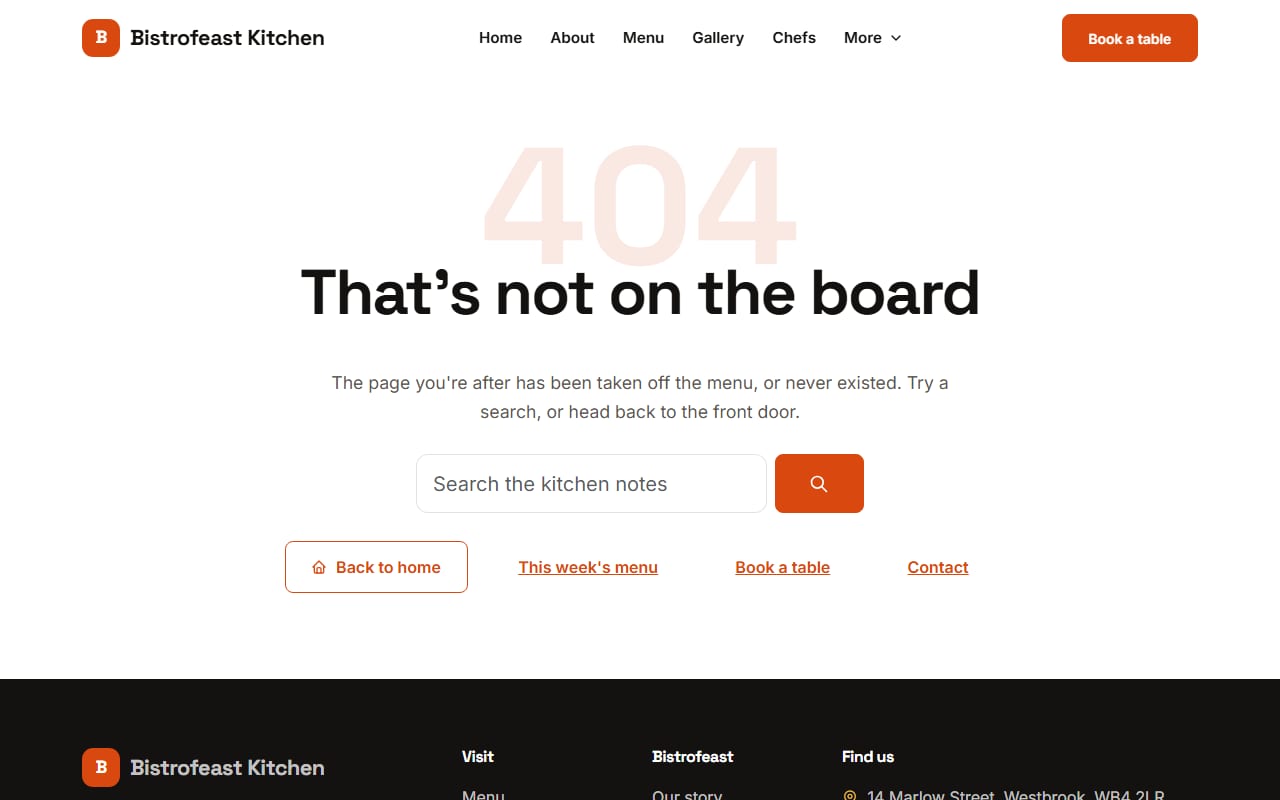
not_found_handling set, a missing page shows the template’s 404 instead of a blank screen.Your Cloudflare account gets one workers.dev subdomain, shared by everything you deploy there. On a brand-new account, Wrangler chose it for me and simply used my project folder’s name. If you’d like a tidier name, set it in the Cloudflare dashboard before you deploy. Most people will put their own domain on the site anyway.
If you’d rather deploy on every push to GitHub, Astro’s guide describes the dashboard route: Workers & Pages → Create application → Import a repository, with npx astro build as the build command and npx wrangler deploy as the deploy command. You still need the wrangler.jsonc file in the repository.
Netlify: switch off the login wall
Netlify needs no configuration for a static Astro site. In the dashboard you connect your Git repository and confirm two settings, the build command npm run build and the publish directory dist. If you prefer a file in the project, Astro’s guide gives this netlify.toml:
[build]
  command = "npm run build"
  publish = "dist"
I deployed with Netlify’s command-line tool (version 27.20) instead, and ran into two problems. First, netlify deploy tried to build the site again by itself before uploading, and that extra build failed. If you’ve already built the site, tell it not to:
npx netlify-cli deploy --dir=dist --prod --no-buildWith that, the site was live in 89 seconds. The second problem looked much worse: every page answered with a 401 and sent me to a Netlify login screen. The site itself was fine. The new site had Netlify’s visitor protection switched on, so only logged-in team members could see it. Once I switched that protection off for the site, the pages loaded for everyone. If your freshly deployed Netlify site asks you to log in, look at the site’s access and visitor protection settings before anything else.
Netlify did find the template’s 404.html on its own, and it read our _headers file without any extra setup.
Vercel: the quickest start
Vercel detects Astro by itself. Astro’s guide says you import your repository at vercel.com/new and “Vercel will automatically detect Astro and configure the right settings.” I used the command-line tool (version 65.17) from inside the built folder:
npx vercel deploy --prodApart from one “fetch failed” network error that went away on a retry, it worked first time: the production address was public within about 30 seconds, and the template’s own 404 page worked without any settings.
Vercel differs from the others in two ways. It ignores _headers files, so custom headers (security headers, or a noindex for a test copy like mine) go into a vercel.json file instead. And every deployment also gets its own long, unique link, which Vercel protects by default: opening it sends you to a Vercel login. Share the main production address with your client, not the unique one, or they’ll think the site is private.
GitHub Pages: free, with one extra setting
I didn’t deploy this one, because we don’t put copies of our demos on GitHub Pages, so this part follows Astro’s official guide. You add a workflow file at .github/workflows/deploy.yml that uses Astro’s official action, withastro/action, and in your repository’s Settings → Pages you choose GitHub Actions as the source.
The extra setting is base. A project site lives at https://yourname.github.io/your-repo/, not at the root, so Astro needs to know the folder:
site: "https://yourname.github.io",
base: "/your-repo",
You can skip base if the repository is named yourname.github.io, or if you use your own domain. With a custom domain, set site to that domain, remove base, and add a public/CNAME file containing the domain.
Any ordinary web host
Because a static Astro build is just files, any host that can serve a website can serve it, including shared hosting with cPanel. Build on your computer, then upload the contents of dist (not the folder itself) into your site’s web root, usually public_html, with the host’s file manager or an FTP program. The two settings that matter are the same as everywhere else: site must be your real address before you build, and the host should show your 404.html for missing pages (most Apache hosts can be pointed at it with an ErrorDocument 404 /404.html line in .htaccess). You lose automatic deploys from Git, so every change means building and uploading again.
Making the forms work after you deploy
This is the step that’s easiest to get wrong, and it isn’t really about the host. A static site has no server of its own to receive a contact form or a table booking, so the form posts its fields to a form service instead (Formspree, Basin, Getform, Netlify Forms or your own endpoint). In our templates you set that address once, in a .env file copied from .env.example:
PUBLIC_FORM_ENDPOINT=https://your-form-service.example/your-form-idHere’s the catch. Astro writes that address into the HTML when it builds the site, not when someone visits. I checked: with the address set, the build put it into the form’s action on 14 of the 15 pages. Without it, the forms still check their fields and show the thank-you message, but the message goes nowhere, which looks fine in a demo and is a disaster on a real restaurant site.
So where you put the address depends on who runs the build:
- If you build on your own computer and upload
distwith a command-line tool or FTP (like my tests), put it in your local.envfile before you runnpm run build. - If the host builds the site from your Git repository, add the same name and value in the host’s environment variable settings, because your
.envfile isn’t in the repository (and shouldn’t be).
Either way, send yourself a test message from the live site after every first deploy. It takes a minute, and it’s the only check that proves the whole chain works.
Updating the site later
How you publish changes depends on the route you chose at the start. With a Git-connected host, you change a file, commit and push, and the host builds and publishes the new version by itself, usually within a couple of minutes. With the command-line route, you build again and run the same deploy command; my second Cloudflare deploy, with a rebuild included, took 25 seconds. With ordinary hosting, you build and upload the contents of dist again, replacing the old files.
For a site that a client edits often, the Git route is worth the ten minutes of setup, because nobody has to remember the build steps. For a site that changes twice a year, building and uploading by hand is perfectly fine.
Which one I’d pick
For a client or small-business site, I’d start with Netlify or Vercel: connect the repository, accept the detected settings, and they show your 404 page without being told. Cloudflare is just as fast and has a very generous free plan, and it’s a natural choice if your domain’s DNS is already there; just remember the not_found_handling line. GitHub Pages suits personal and open-source projects. Ordinary hosting is fine when a client already pays for it and changes are rare.
On any host, I’d follow the same order: set site, build locally, deploy, then open a page that doesn’t exist and view the source of the home page to check the canonical link. Those two checks take thirty seconds and catch the problems I ran into.
If you’re still choosing a framework, I compared the two we build with in Astro vs Next.js. And if you’d like a site that’s already built and ready to deploy, every design in our Astro templates collection ships with a README that covers building and deploying, including the Bistrofeast Astro template from this test.
Frequently asked questions
Do I need an adapter to deploy a static Astro site?
No. Adapters such as @astrojs/cloudflare, @astrojs/netlify or @astrojs/vercel are for pages rendered on the server when someone visits. A static site is built ahead of time into the dist folder, and any host can serve it as it is.
Why do my canonical links point to example.com?
Because site in astro.config.mjs still has a placeholder value. Set it to your real address, build again and redeploy. Your sitemap and RSS feed are fixed by the same change.
Why does my Cloudflare site show a blank page for missing pages?
Cloudflare Workers doesn’t use your 404.html unless you tell it to. Add "not_found_handling": "404-page" under assets in wrangler.jsonc and deploy again.
Why does my new Netlify site ask me to log in?
Visitor protection is switched on for the site or for your team, so only logged-in members can see it. Switch it off in the site’s access settings and the site becomes public.
Why doesn’t my contact form send anything after deploying?
Usually because the form address wasn’t set when the site was built. Astro writes environment values such as PUBLIC_FORM_ENDPOINT into the HTML at build time, so set it in your local .env before building, or in the host’s environment settings if the host builds from Git, then build and deploy again.
Should I use Cloudflare Pages or Workers for Astro?
For a new project, Workers. That’s what Cloudflare and Astro recommend today, and Cloudflare’s own tool now steers new Pages projects to Workers. Existing Pages sites keep working; Cloudflare has a migration guide when you’re ready to move.
More from the blog

Restaurant Menu Plugins for WordPress: Which One You Need (and When You Don't)
Menu plugin, ordering plugin or a theme with the menu built in? We compared the main WordPress options on installs, ratings, updates and what's really free.
Read article →
Best Free Website Templates for a Small Business (2026)
Free templates for restaurants, gyms, salons, real estate, clinics, agencies and more, all rebuilt in 2026. What to check before you download, and when paying saves time.
Read article →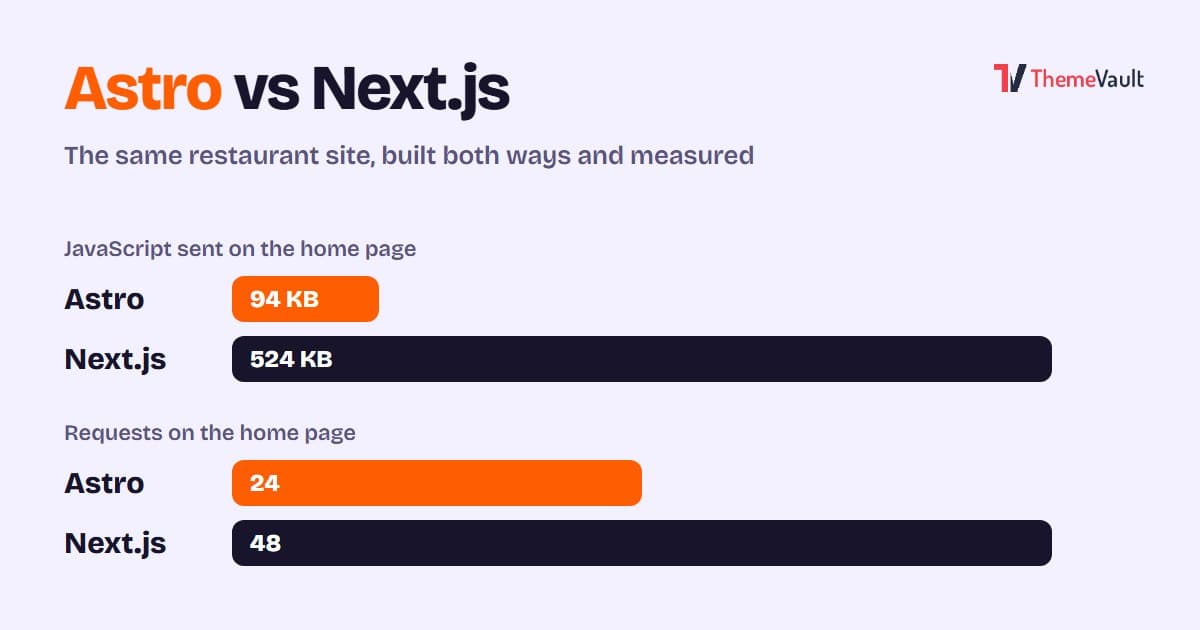
Astro vs Next.js for a Business or Marketing Website (2026)
We built the same restaurant website in Astro and in Next.js with an admin panel, then measured both. Where Astro wins, where Next.js wins, and how to choose.
Read article →